How to create a checklist?

Repetitive tasks are inevitable and often happens from time to time. PropSpace has a useful feature called the “Checklist Template Manager” which allows a user to create and save a checklist to organize their process and not to miss any important steps or documents.
To create a checklist, follow the below steps:
1. Navigate to “Admin” and click “Checklist Template Manager”
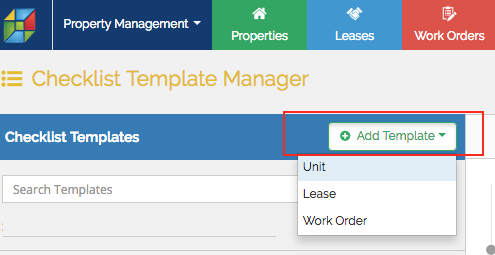
2. Click the “Add Template” button and select the required screen.
3. Enter the name of the checklist and task name. Additional tasks can be added once the first one is saved.
a.) If the created task requires a document, you may set-up an option to upload one. To do so, click “Show Advanced Settings” and click “Add a document”.
b.) There is also an option to default a checklist by ticking the “Use As Default” box. The defaulted checklist will automatically be generated according to which screen it was created.

4. Once done, click “Save”. The checklist will now be saved under Checklist Templates.
Note that only Manager and Admin users can create a checklist.
Recently viewed articles
Related articles
No Related Articles Found.